So seriously. The super cute string art seen all over Pinterest is adorable for weddings, bedrooms, housewarming gifts and camp cabins…which is what I used mine for. Here are just a few examples of really cool string art.
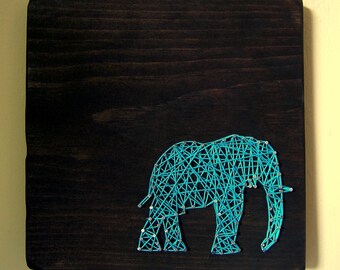

Aren’t these adorable? I thought so and I really wanted to make my own right before I went back to work at my habitual summer camp job. I’m going to let you in on a little secret. At the camp I work at we have camp names and mine is Sunny! So of course I’m going to make a giant sun string art. Here’s the easy how to!
1. You need to gather your supplies. You’ll need: a sturdy wood board (don’t get particle board..you will never be able to nail through it), wood stain (if you want to change the color of your board), nails, a hammer, colored thread or string, glitter (optional…but not really), glue (optional), paintbrush, foam applicator, newspaper and a marker.

2. Once you find your not to thin but not to heavy board (for a reasonable price I found mine at Menard’s in the discount wood section), you might want to stain it. I found some stain from the family collection of leftover odds and ends. Apply the amount of stain desired and wait for it to dry. This is honestly the most time consuming part, waiting for the stain to dry.

3. While its drying, grab some newspaper about the size of your board and draw out your design. This paper will serve as your template.
4. Now that the board is magically dry, put the newspaper on top and start pounding nails in just enough to stand straight even when weight or pressure is applied to it. The nails can be as close together as you want them or as far away depending on what you envision.

5. Once the nails are finished and your hand never wants to use a hammer again you rip the newspaper right off with a clean finish.
6.(OPTIONAL) I added a little glam because it’s necessary as a girl. Apply Elmer’s glue with a paintbrush to the section that will have glitter on it. Immediately shake an overly generous amount of glitter on the glue area and let it dry. After the glue is dry, shake all excess glitter off the board.

7. String. Tie the beginning of the string to one of the nails and then start weaving the thread everywhere and anywhere.

Voila! You have your own masterpiece! Are you ready to get crafty today?
